· creativity · 7 min read
Breaking the Rules: Controversial Sketching Techniques You Should Try
Challenge conventional sketching norms with bold, controversial techniques - from blind-contour and non-dominant-hand drawing to fumage and erasure-as-addition - to spark faster ideas, loosen your mark-making, and uncover surprising forms.
What you can achieve here - fast
By the end of this piece you’ll have a toolbox of provocative sketching experiments that break polite studio rules and produce honest, surprising work. You will: loosen your hand, generate ideas faster, and learn how deliberate ‘mistakes’ feed invention. Read one technique. Try it for five minutes. Expect new directions.
Short. Actionable. Transformative.
Why break the rules?
Rules exist because they work. Perspective, value control, accurate proportion - these are invaluable. But rules can calcify into fear. Fear kills risk. Risk births discovery. When you deliberately break a rule you get information you can’t get any other way: accidental forms, fresh rhythms, and decisions made under constraint.
This article collects controversial approaches with clear exercises, cautions, and ways to integrate discoveries into your regular practice.
Quick safety guidelines
- Start small - warm up with 5–15 minute probes.
- Use cheap paper for ‘ugly’ experiments.
- Treat results as drafts, not failures.
- Combine a conservative study session with one rule-breaking session - balance skill and surprise.
1) Blind contour - see by feeling
What: Draw the subject without looking at your paper. Keep your eye on the subject and your hand on the page; do not lift the pen. Why: Forces observation, exaggerates relationships, produces lines that record a direct sensory link between eye and hand. How: 1–2 minute drawings. Slow your eye, follow an edge, then connect shapes. Repeat three times. Reference: Blind contour drawing - Wikipedia
Result: awkward but honest lines. Use them as underdrawings or to loosen a finished piece. The line tells more about attention than accuracy.
2) Non-dominant hand drawing - emancipate the line
What: Draw with the hand you don’t normally use. Why: It reduces fine control, forcing broader gestures and surprising ideation. How: Start with 30-second gestures. Progress to 5-minute studies. Use charcoal or soft graphite for forgiveness.
Try this when you’re stuck on a ‘perfect’ drawing. You’ll discover marks your dominant hand would never make. The hand gets angry. The marks get honest.
3) Continuous-line (one-line) drawing - neaten chaos into rhythm
What: Complete a subject with a single unbroken line. Why: Teaches economy, connectivity, and compositional flow. How: No lifting the pen for 1–10 minutes. Emphasize motion over detail.
This discipline makes you declare relationships quickly. The constraint drives decision-making.
4) Erase as drawing - subtraction is creative
What: Use heavy graphite, charcoal, or ink washes, then pull out light and form by erasing. Why: Inversion changes your visual priorities: you think in light, not line. How: Lay down a rich wash or heavy charcoal. Use kneaded eraser, rubber, or scraping tools to lift marks into highlights.
This flips the sketching hierarchy. Instead of adding line to nothing, you reveal form from darkness. It will recalibrate how you see values.
5) Negative-space first - draw the void
What: Ignore the object and draw the spaces around it. Why: Solves proportion errors and trains composition. How: Focus on gaps, contours between limbs, the shapes under a chair, the silhouette between objects. Block those shapes first. Reference: Negative space in design - Wikipedia
You’ll fix many proportion problems before they start. This is cheating - effective cheating.
6) Automatic drawing & chance operations - let surprise lead
What: Embrace subconscious marks; use chance (rolls, cuts, random brushes) to decide composition or line direction. Why: Surrealists used it to bypass conscious censorship and ignite novel imagery. How: Start marks with closed eyes. Fold paper and make ink blots. Combine random marks into forms. Reference: Automatic drawing - Wikipedia
The results are raw routes into metaphor and memory. The best discoveries are accidental.
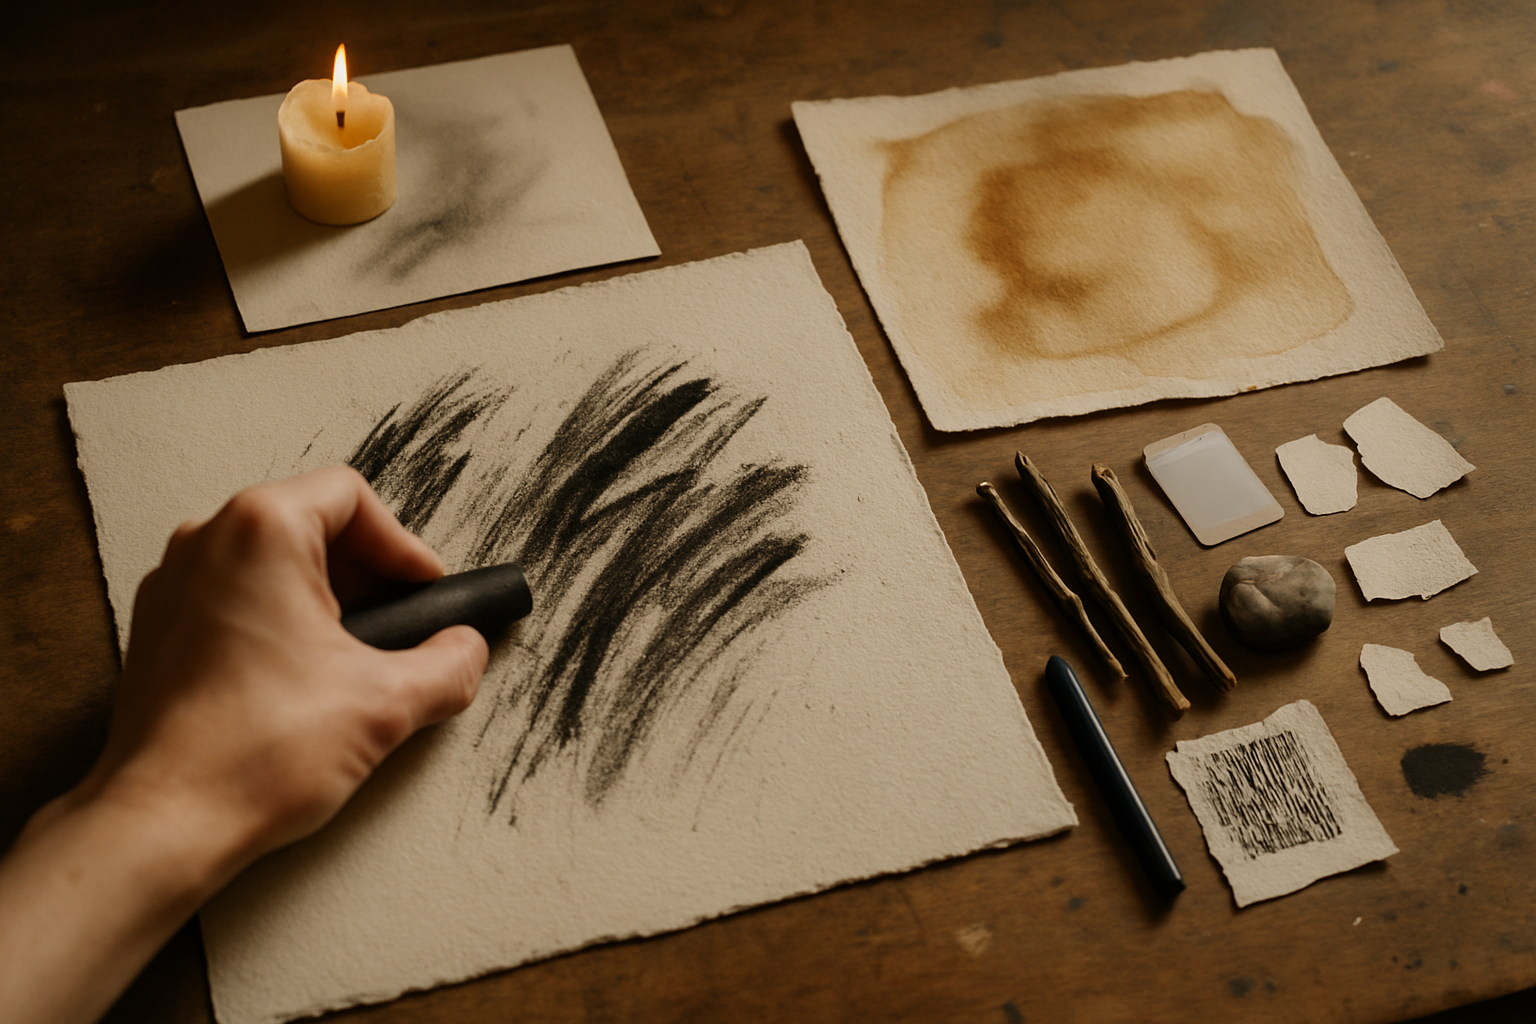
7) Fumage (smoke drawing) - draw with soot
What: Use candle or lamp smoke to make marks on paper or canvas. Why: The medium deposits unpredictably - soft, smudged, organic gradients you cannot get by hand. How: Hold the paper near smoke sources, funnel soot, then fix with spray. Be careful: ventilate and keep a safe distance from flame. Reference: Fumage (smoke painting) - Wikipedia
Use fumage as atmospheric underpainting or to create ghostly textures. It’s dangerous and brilliant.
8) Frottage and texture rubbing - borrow the world
What: Lay paper over textured surfaces and rub with graphite, crayon, or charcoal to record texture. Why: Introduces instant, tactile complexity and unexpected compositional elements. How: Walk the neighborhood. Collect textures: tree bark, manhole covers, fabric. Rub. Arrange rubbings into collages. Reference: Frottage - Wikipedia
Textures stimulate narrative ideas that pure observation rarely produces.
9) Toolbox swap - use odd tools
What: Draw with sticks, ballpoint pens, ballpoints without caps, coffee, tea, lipstick, or credit cards. Why: Each tool constrains motion differently and forces inventive marks. How: Schedule a “tool hour.” Ten minutes per tool. Treat each result as a study.
A ballpoint makes precise hairlines. A credit card drags flat, wide strokes. The tool becomes a collaborator.
10) Layered erasures and collaged corrections - edit physically
What: Work in layers, tear, collage, overpaint, and re-draw. Use ripped paper patches to disrupt continuity. Why: Editing becomes visible. The process reads like archaeology and invites serendipity. How: Intentionally ruin part of a sketch. Patch it. Integrate the patch into the image.
This is a discipline in humility. You will break things. You will make them better.
11) Limit your palette - single-value experiments
What: Draw with a single tone (one marker, one wash, one pencil hardness) or with only complementary values. Why: Constraints force imaginative problem-solving and stronger value-reading. How: Try a 30-minute study in only two tones: mid-gray and a dark mark. Or use just sepia ink.
One color simplifies decisions and amplifies concept.
Exercises to start right now (30–60 minutes)
- Five blind contours (1–2 minutes each). Pick the best line and elaborate with erasure-as-drawing for 10 minutes.
- Non-dominant hand gesture series - 8 x 30 seconds. Choose two gestures to develop with continuous-line work (5 minutes each).
- Smoke + rub - make one fumage background, overlay frottage textures, and edit with erasure/collage for 20 minutes.
Rotate these exercises weekly. Keep a folder of ‘failed’ pages - they’re idea mines.
When a controversial technique becomes useful
Use these methods to: loosen up, start a painting, break a creative block, or teach observational humility. Integrate elements back into tidy work: a blind-contour underdrawing to energize an accurate portrait; a fumage ground to add atmosphere under controlled rendering.
Don’t fetishize ugliness. Use it as a tool.
Common objections and answers
- “These are gimmicks.”
They are. And they can reveal things line-by-line that traditional drills never will. Use them strategically. - “It’s messy and impractical.”
Yes. Make a messy hour. Then you’ll have better options for the tidy hours. - “I don’t feel skilled enough to try.”
That’s precisely the point. The constraints level skill and amplify discovery.
How to critique results
Ask three questions after each experiment:
- What surprised me?
- Which accidental mark could become intentional?
- How can I translate that discovery into a controlled study?
Answering these transforms random play into lasting growth.
Mix-and-match challenges (advanced)
- Continuous-line + fumage - do a one-line drawing, then smoke the paper and see how soot finds the line.
- Erase-as-draw + frottage - lay down heavy tone, rub textures on top, then lift highlights to reveal both texture and form.
- Non-dominant hand + limited palette - force unfamiliar marks within a strict color constraint.
These combos generate layered results you can’t plan for.
Final word - break with purpose
Breaking rules is not rebellion for its own sake. It’s strategic sabotage. It destabilizes habits so you can see differently. Do it regularly. Be playful. Be brave. Keep the useful parts; discard the theatrics.
And above all: let the accidental become a tool. The best discoveries are the ones you didn’t mean to find.